Digitising a 3 Manual Compton-Makin Organ: Part 1 - The Move

So, being an avid user of eBay and also playing the organ, I did the next natural thing and bought an organ console (not one with real pipes mind you - I don't have space for anything like that!). It was listed as not working, but otherwise in good condition.
It's a lovely console in great-looking condition with 3 manuals, full push-pull draw stops and a 32 note radial pedalboard.
First problem, was moving it out of the church I bought it from. To say it's a heavy instrument is an understatement... From doing freelance lighting and AV work I'm used to moving heavy objects, but this was something else entirely. Hollow bottom, no wheels and wedged in the back corner of a raised alter in a church were some of the problems to name a few.
Having said this, moving it the initial way out of the church once up on a pair of wheelboards wasn't too bad only taking 30 minutes or so.

Unfortunately, even this short trip was not without casualties and one of the wheelboards ended up being not so wheely...
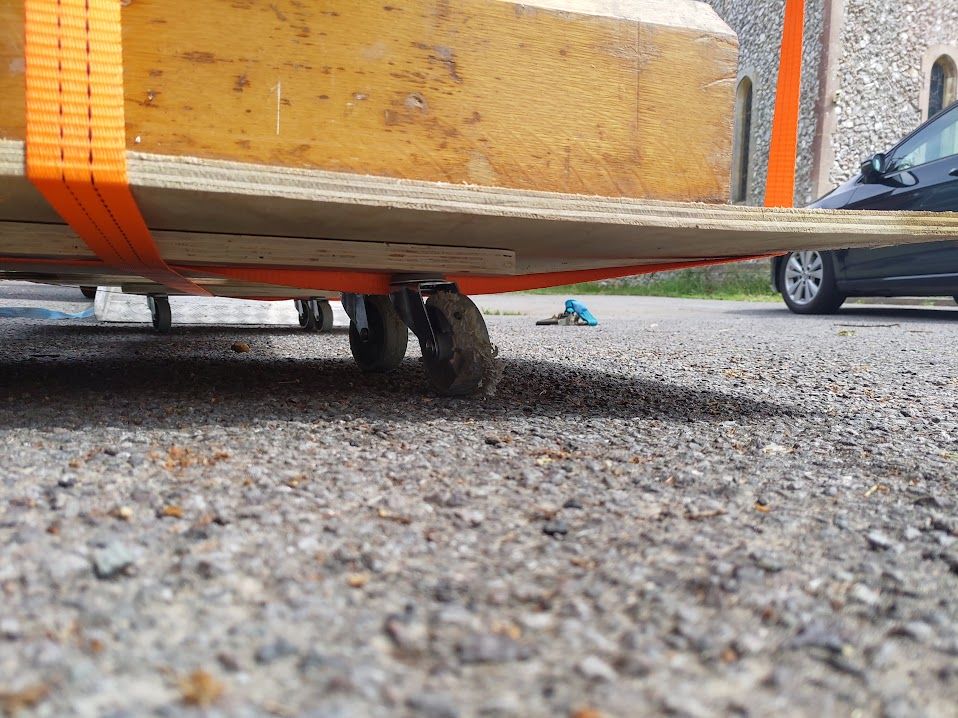
The next issue was getting it up the ramp into the van, a task I initially thought wouldn't be too difficult once on wheels. However, the corners of the ramp were just high enough to cause the bottom of the organ to beach itself as soon as the ramp was reached. As well as this, the weight of the organ was not something that could simply be pushed up the ramp with 2 of us.

So, the disassembly had to begin. Starting with the top cover - a 40mm solid chunk of wood covering the entire width and depth of the instrument (1780mm x 930mm) allowed a decent amount of weight to be shed. At this point, with the instrument outside, this allowed a good look onto the internals of this great instrument.
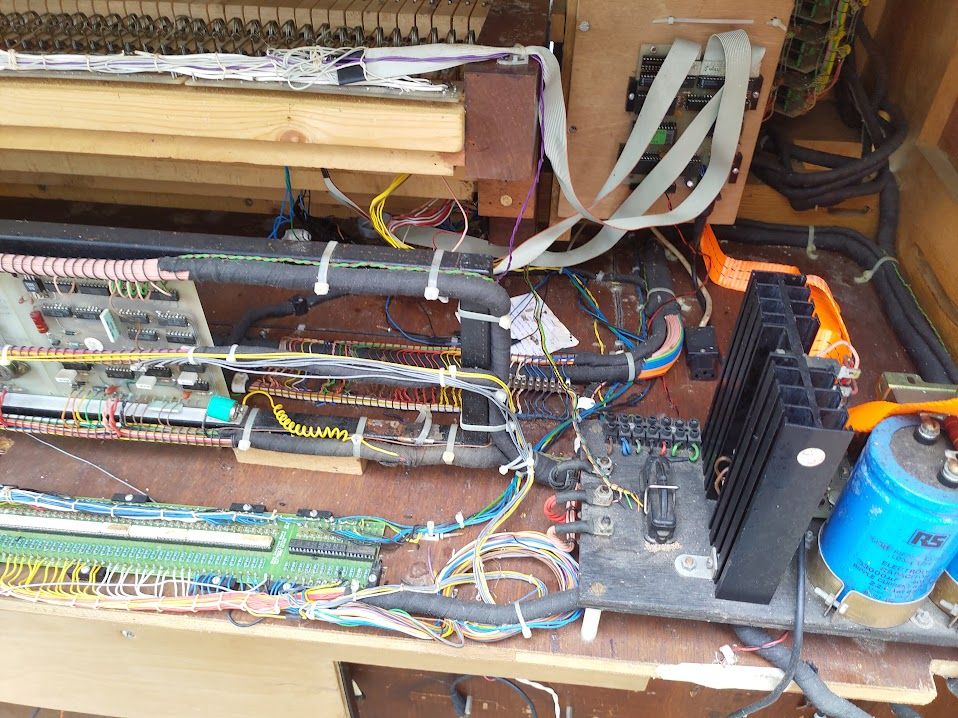
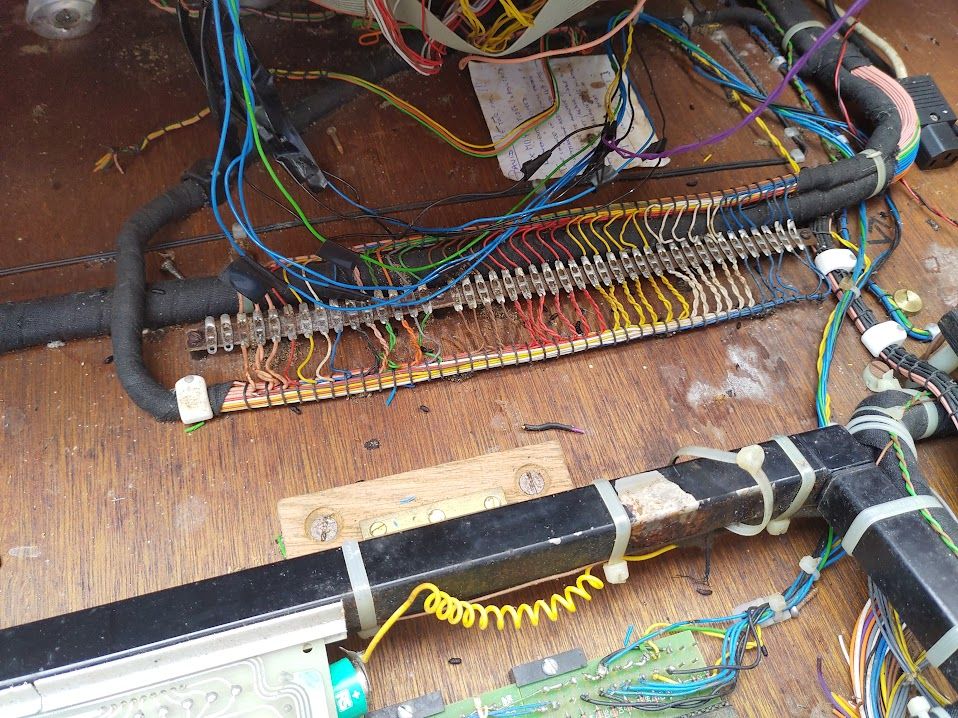
A large amount of carefully custom loomed cables were a spectacle to behold amongst some quite dodgily done bodges that clearly stood out amongst the original cabling. All of the original Compton wiring of the solenoids driving the stops, the manuals, and associated driving circuitry were loomed in the black twisted snakes you can see above. Between each part of the organ were large solder-tab strips for easy debugging and maintenance. The Makin rebuild was also quite well done, although differentiable from the original. These were still loosely loomed, but not quite as tidily formed. The most recent fixes stood out, with random unlabelled wires being electrical-taped together in splices and connecting very odd bits of circuitry together.
Anyway, these electronics were something to figure out and look at later on once the organ was moved out of the church carpark! Next up - the manuals, these appeared to be providing a large front-heavy mass and should be easily removable for maintenance right?
The initial screws seemed promising, giving a good amount of movement - however something in the middle still remained tying the manuals to their unmoving base. Then it clicked, there were hinges on each manual! For easy maitenance of the switch contacts, each manual in turn can be swung up out the way; including the second-to-last revealing the final 2 screws! (I wish I had some pictures to put in here, but with all the time it took to disassemble I guess I wasn't in the mood for taking pictures at this point!).
With around 100kg of load now shedded from the organ, moving it up into the van wasn't too much of an issue, just the last bits of standard van-tetris to fit in the pedalboard, bits we'd taken off and an organ stool.
Oh, and not forgetting these stylish speakers (yes they are also as heavy as they look):

